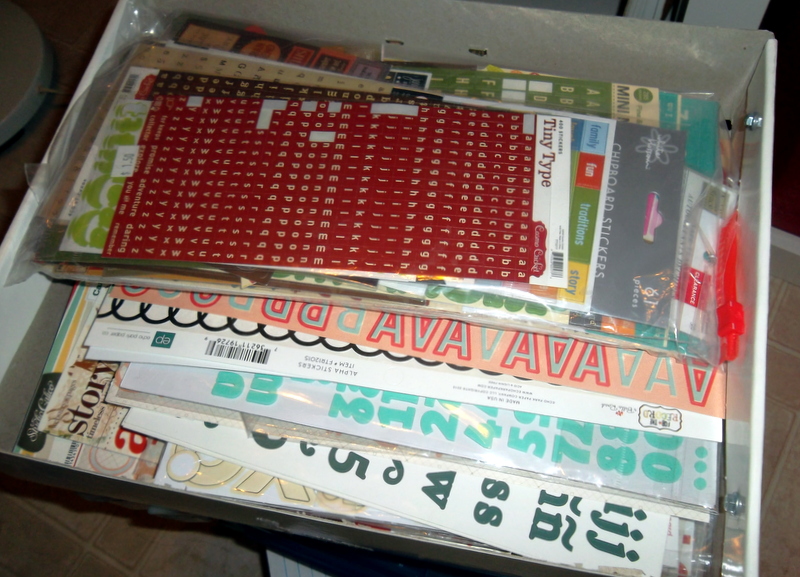
So, organizing for me- and maybe most scrapbookers or crafters- is an ongoing process: how best to contain and store the supplies so that you know what you have, can get to them when you need them, and can keep the space organized (as organized as necessary, depending on where you work) when you're done? I still haven't hit on the winning combination, but I think I'm getting closer. I also think part of it is knowing how you work, and doing what's best for the way you work. There are so many items you can buy for organizing crafting supplies that it can get overwhelming. If you look at magazines or the internet, you can see countless 'pretty' pictures of creative spaces where everything is sorted by color, or by item type and color, in boxes or jars... and sometimes I wish mine could look like them, but they just don't work for me.
In the past, I've tried sorting and organizing things into small containers, or little drawers, like the photo below (this pic is from our previous house):

(It's messy, but I wanted to point out a couple things- the first is the yellow unit on the left side with the labeled drawers. I sorted little things (buttons, brads, etc) into the drawers, but then I'd have to open 4 or 5 of them to find exactly what I wanted. Some of my unmounted rubber stamps were stored in a large three-ring binder on the shelves above the desk. It might look good for storage, but I'd never use them! The shelves above the desk also hold bins (homemade) that I used for storing my paper scraps in zipper bags, sorted by color (ROYGBIV). Again, after I sorted and stored them, I'd never use them again. The paint-can-looking thing in the middle of the desk was for organizing tools; it had lots of little pockets for holding your pens, scissors, and the like. You guessed it- I'd never use any of it. (or if I did use something, I wouldn't put it back, because it was too hard to find it again.)
So, my new strategy for organizing is: Categorized Rummaging, lol! I'll explain a bit below...
This container holds scissors, adhesive, my most often-used mini alpha stamps, replacement blades for my paper cutter, etc... the things I need for most of my scrapbooking or crafting projects. I've been using the tool bin for a while now, and it seems to work pretty well; I can see what's in it by just opening the lid, and things are well-contained inside it. Obviously it travels well if I scrap away from home, but even when I'm home, I just leave all these supplies in it. That way, there's only one place I have to look for any of these items. And it's clear, so I can see at a glance what's in it (in a general sense, anyway).
Since this had been working for me, I decided to do something similar with my other supplies. No more teeny drawers of things sorted by color, no more boxes that I can't see into so things get forgotten about... I need to see it so that I'll use it, but still be able to contain things (somewhat) so they don't get dusty, or don't get chewed up or dragged around by cats. (don't laugh, they've done that!)
 |
The decorative tape bin
(along with a few stamps that I need to put away)
And hey, there's plenty of space for more tape!! lol! |
 |
| The memorabilia bin |
I bought a number of 12x12 bins at Michael's recently when they were on sale for super-cheap; they don't have the handle like the ArtBin does, but they'll do just fine. This particular one is where I've started to put memorabilia I might want to use for a SB page- various pamphlets, business cards, maps, stuff like that. This container / category is still a work-in-progress, but it's better than where this stuff used to be, which was in assorted bags stuffed on a bookshelf, or worse yet, piled in the middle of the kitchen island!
 |
| Shiny stuff-- rhinestones, sequins, and the like. |
A lot of people do their organizing by color- all the blue paper, stickers, rhinestones, thread, etc together. That's fine for them if they think like that... "I want to make a blue-themed page so I'll get all my blue stuff out." That's not how I work, though. I haven't figured out what my exact thought process is quite yet, but I know it's not that. So, I sorted through my stuff and took out all the similar things- is it shiny or does it have rhinestones? if so, it goes in this bin. (this stuff will probably end up in a box with a lid, so I can travel with it if needed.)
 |
The 'additional stuff' bin, for want of another term:
border stickers, other stickers, chipboard shapes, flowers, etc. |
Other people create their pages or projects based on the manufacturer brand-- they might want to make a page or card using all Echo Park or Studio Calico materials, so they store their supplies separated by manufacturer. I did have some of my stash organized by manufacturer, but again, there would be a lot of stuff I wouldn't ever even look at, let alone use. With my supplies organized into larger categories (based on 'what' it is rather than who made it or what color it is), there's at least some chance I'll look at it and use it on my page, no matter what company made and sold it.
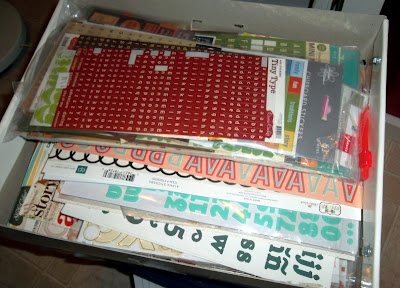 |
The alphabet sticker box, separated into two
arbitrary categories: 'large' and 'small'
Again, all different colors and all different
manufacturers are stored in the same box. |
I haven't really used this new system to make a scrapbook page yet so I don't know how well it will actually work, but I'm thinking it's closer to the way I think and create than the way I used to have things stored. I like 'rummaging' through boxes and shelves when I'm at a flea market, antique store, or estate sale, so I decided to apply the same sort of thinking to my scrapbooking supply storage.
 |
Journaling card storage: all sorts of stickers, cards, and
shapes that have blank spaces for writing on. (mostly) |
In addition to journaling cards, the container above (sorry for the dark photo) also holds my small stash of October Afternoon, Cosmo Cricket, and Studio Calico stickers and cards (right after I said I didn't want to separate things by manufacturer, lol!). But those are my very favorite ones, and this will hopefully make it easier to find them when I want to use them.
There are more categories of things I don't have current photos of yet (patterned paper and cardstock come to mind) and others I don't have completely sorted out yet, like my stamps and inks. I'll take more pictures as I finish the re-organizing process.
One other thing this has shown me about my supplies is that I have alot more of some things than I thought. I would have never thought I had enough alphabet stickers to fill that entire box! That means I don't really need to buy any more until I use some of them, loL! And hopefully now that they're more centrally located, I'll find it easier to do that very thing! Not everything is organized yet, and I certainly wouldn't call this system 'totally' organized (or pretty) by any stretch, but it's a start... and it's a bit of a mind-shift for me that will hopefully improve my creative process in the long run. We'll see how it goes, and whether I need to tweak it some more.
Hopefully this new method of organization will help me to avoid a work space that looks like this:
(in my defense, this pic is of my space at a weekend long crop where there were no cats. But still, there's only so long that you can work in a space that looks like this- and it isn't very long, lol!)