My first class at Art Unraveled was Monday: an all-day class titled Two Art Quilts Two, with Jane LaFazio. I decided to take this class because I love fabric, I do like sewing sometimes (as long as the sewing machine isn’t involved, that is!), and because I loved the pet portraits in the class description… I still really want some sort of portraits of Cleo and Phoebe, and was really excited by seeing her interpretation.
I found Jane LaFazio through Flickr-surfing, I think. She does amazing watercolor journaling, and wonderful art quilts of all kinds. Since then, I’ve seen her work a couple more times in Cloth, Paper, Scissors magazine… fabric and sewing, sometimes combined with paper: what could be more perfect than that?? (perhaps only some glue and stamping added in for good measure!)

This is one of Jane's pet portraits... I love the buttons on the edge!!
We started with the pet portrait- I only had really crappy photocopy enlargements of photos printed off my Flickr account, but I think it turned out okay, considering what I started with. We started by tracing the major shapes onto tracing paper (think paint-by-numbers, or coloring book), then transferred it to unprimed canvas using a Sharpie marker. From there, we started painting using thin washes of acrylic paints…Jane said when coloring in the shapes, don’t think about the “actual” color of the pet, but rather, think about their “aura” and their personality. I had really wanted to make Cleo’s picture a really soft, sage-y, olive-y green, but couldn’t get the paint color right, so she ended up being kind of pop-art instead, but actually, when I think about it, Cleo wasn’t a soft, sage-y kitty in real life, so I think the blue and yellow fits, after all.
 I think I managed to capture her personality in the facial expression; I’m really proud of that. The next steps are stamping her name at the bottom, layering the batting and backing with the front, stitching the outlines and details, and finishing it off with an edging of some sort… hopefully, anyway! I really had HUGE expectations of perfection for the results of this project, (like everything I do, naturally) so perhaps I shouldn’t have done something with so much personal meaning for my first try, but I still think I’m going to finish it.

My tablemate for this class was a member of the East Valley Mixed Media group; I mentioned that I recognized her from the one meeting I attended, so she invited me to lunch with her- How nice of her!! This group of ladies meets once a month (in downtown Chandler, in the evening) to learn/discuss/share all sorts of things associated with mixed-media artwork… I’ve been trying to figure out how to attend regularly, but with Tom’s unpredictable travel schedule and the distance, it hadn’t been working out. Anyway, we had a very nice lunch with a couple other members, then headed back for the Landscape Quilt portion of the class.
Below is one of Jane's examples of a mini landscape quilt: I really like the way she used the sheer fabric in the sky, and how the frayed edges of the fabric suggests grass and growing things. And, if you look close, each of the colored bits in the lower left is an individual fabric scrap, sewn on by hand!
 Again, I had definite ideas of what I wanted to do with this project, but my creative muse decided otherwise- I had purchased several beautiful batik fabrics from a (sort-of) local quilting shop, and thought I would make a desert landscape with mountains in the background. Jane’s approach to this project was to take a few fabrics, lay them next to each other, see what worked, and pull out/replace fabrics till you get something that feels and looks “right” to you. While I was pulling my supplies for the class together, I decided to throw in some other fabrics from my stash to take in addition to the batik.
During my process of pulling fabrics out and laying them down, I tried to make the desert landscape I wanted, but some of the fabrics just didn’t work, so they got replaced with my other cottons… more of this trial and error process (“no, try this one” and “how about using a piece of this?” from Lulu’s stash of fabrics) led to my landscape changing from a desert mountain scene to Midwestern rolling hills and fields, instead… amazing how that happens, isn’t it??

This landscape also needs lots of work to finish, although I have ideas for some of the details: embroidered grass, running-stitch plowed furrows in the fields, and tan buttons to represent round hay bales. And perhaps some running-stitch swirling clouds in the sky… or maybe a bird or two flying over the fields…
This class was a lot of fun, and it led me to reconnect with a group of really interesting people I hadn’t thought I would be able to again… it also showed me that sometimes pre-conceived notions and thought-out plans about projects can be (sometimes need to be) discarded in favor of what works at the time with how you’re feeling, which can lead to a totally different (but no less successful!) result in the end.
 this photo is my table set-up... I had a few more things that I couldn't fit onto the table, but this was most of it. Marble magnets and thumbtacks, collaged domino pendants and keychains, handmade cards and tags, and a couple pieces of mixed-media artwork. I did a fair number of sales, and also got inquiries about custom work, which was an unexpected bonus. I got to bed about 11:15 pm, and got up early on Saturday for the next thing...
 a class where I made this journal!! I took an all-day class at Frenzy Stamper in Scottsdale on Saturday, making a journal using found papers and fabric-- the entire cover of the journal is sewn-- yes, I learned that I can be friends with my sewing machine! Jane Eileen is a great teacher; I've wanted to incorporate sewing on paper into my projects for ages, but have always been hesitant-- Jane said she's sewn through aluminum soda cans, and all sorts of things... I guess I just needed to hear that it's "okay" to do things that a traditional sewer might construe as abusing a sewing machine... lol!
 This journal is called the "Double Double Journal;" it's actually two journals in one- one on the left side of the center spine, and one on the right side of the center spine. It was lots of fun to choose random fabrics and ribbon, sew them on, and see what happened. click here for the Frenzy Stamper blog, to see a couple photos of us in action during class. I will definitely be doing more of this type of sewing in the future-- it was so much fun! ...then, today, we had to get up early again, but for another fun reason-- we headed up to Glendale to Roseglen Shelties, to bring home our new Sheltie puppy, Prescott.
 This photo is Prescott making friendly overtures to the cats... they definitely need some time to warm up to him, which is evident from this photo-- Butters looks absolutely evil in this picture!
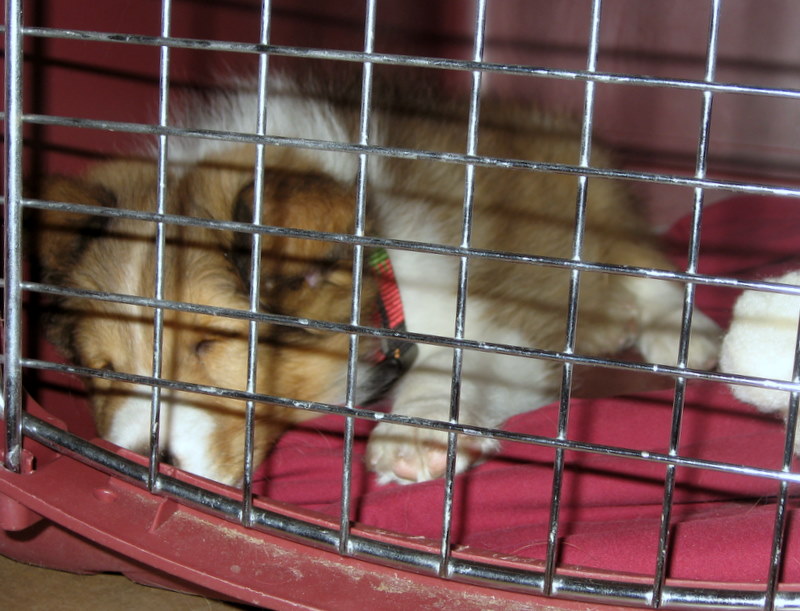 Prescott had a big day-- first car ride, touring the pet store (to buy a collar and leash), meeting Bisbee and the cats, and exploring the house (the tiled kitchen, at least). Right now, he's pooped out, and napping in his crate. We're both pooped out, too!!


