Showing posts with label organizing. Show all posts

April 10, 2013

non-layout scrappy projects (and some scrapbooking)

First, a detail shot of the cactus garden nursery layout so far. I'm not quite done with it yet; right now I'm at the 'fiddling around' and adding 'just one more thing' to it before I write the journaling stage of things, which can take a while, the way I work. I guess I'm just not a '30-minutes start to finish' type of scrapper, because I keep thinking of small details that would add something to the page. Instead, my layouts sort of evolve over a week or two as I work on them here and there when I have some time. 

detail of the horizontal strip background
I started out with only the multi-colored striped paper decorating the background borders, but quickly decided the other sections looked a bit plain by comparison. So I added bluewashi tape (it's such handy stuff to have around!) and two border stickers to the other background sections. I think the layout design is finally 'done' now, so all I have left is the title (which will be letter stickers (and journaling (to be typed on my typewriter and added in as strips).

So, I'm almost there! Except for the fact that now, something about the photos I chose for this layout sort of 'bothers' me... I chose photos that represented the main highlights of the place, but now I think I'm going to make at least one more page so I can include some additional photos.

And now on to some other scrap-related stuff:

I bought an 18x24 piece of quilter's template plastic, for about $3,
and s
pent some time last night making a 12x12 'sunburst' stencil.
(And I still have enough material to make a couple more stencils!)


Here's the first test of my new stencil- I like it!
There are some stencils available to buy with this design,
but I don't think they cover the entire space of the 12x12 page,
which is what I really wanted to be able to do.
Here's a totally separate layout that I made last night after I finished cutting the stencil. (I could have finished up the cactus nursery layout, but I just 'wasn't feeling it' for some reason, and I don't like to force my creativity. Things start to go wrong when I make myself work on a project without being really inspired.) Shimelle posted a new page sketch on her blog a couple days ago (go here to see it), and I used her sketch to scrap one of my 'orphan' photos:

a random (non-digital) photo of a peony bouquet, from the year 2002, by the info on the back. I have a stack of random single photos like this- not enough
to warrant a multi-photo or multi-page layout, but still nice enough photos that I want to include them in my album. This layout uses some challenge elements from the SB site challenge I'm working on, too: inking (the pink dot stencil in the background and the gold splatters), washi tape (it's a vellum border sticker, but I'm counting it, lol!), and die-cutters or punches (the large scalloped border).


The background paper I used for this page is also quite random: I went to an estate sale last week, and picked up an entire 12x12 Iris box of scrapbooking supplies and odd sheets of paper for a steal. At first glance, I was not going to use this paper for ANYthing except maybe as a background to protect my work surface, but then I decided it would fit in very nicely for this page-- I love it when things work out like that!

my splattering got a bit out of hand, but it turned out okay
in the end, and it echoes the gold dots on the vellum.

my newest (old) scrappy storage: two wire wine storage racks, made in France. I got these at a community-wide garage sale I went to over the weekend. The minute I saw them I thought I could use them for something storage-related! Of course, it required a pretty extensive 'clean off' and re-organize of my work desk, but I think it was worth it.
the left-hand one is empty, showing what they looked like when
I found them. Not very easy to store anything on them with
all that open space, so I had to get a bit creative with it.
I cut heavy-weight patterned paper to fit the 'shelves' on the wine racks, and folded a bit of paper for the back, to keep things from sliding off. I also added a couple punched circles as 'handles' in case I need to slide the shelf out of its space.
This shelf holds my brown and black ink pads, and the ink applicator
tool. These were on my desk before, so this wine rack was a
great way to gain additional actual 'work' space. I made a small 'tray'
for the ink applicator tool, so it doesn't get ink all over the paper shelf.

This shelf holds a cork-board (it's half of a cork trivet from Ikea, actually)
that stores a few other tools I use quite often. A chisel, my super-fine tweezers,
corsage pins, a paper piercing tool, and the like. 

(The corsage pins are handy for carefully positioning- and removing- stickers 
from a page if you need to move them; ask me how I know, lol!)
So, now that I've done some random scrapping, random re-organizing, and random creating of art materials, I think my next goal is to actually finish that 2-page layout. (hopefully, anyway! ...we'll see what happens.)

April 05, 2013

SB layout in process: Bach's Cactus Nursery

Making this scrapbook layout is an experiment in (hopefully) streamlining  my process of choosing materials for a SB layout. To that end, I'm sort of 'talking' through my process, here, so if you don't want to read that, you can skip over this post, and wait till I show the finished product! (I won't be offended, I promise!)

Choosing supplies is one of the parts (besides photo editing- but that's a topic for another post) that takes the longest for me, so I want to see if I can speed that part of the process up some. 

I decided I would start this layout 'backwards' from what I usually do: instead of starting with the photos, I started by first pulling together  a bunch of potential choices for embellishments, letter stickers, and papers that I thought might work. The only things I had already decided were: 1) that the background would be cardstock in some darker color- no white or cream, and 2) that it would be a 2-page layout, so I'd potentially be using larger pieces of paper rather than scraps. And okay, I guess didn't disregard the photos altogether: since the photos are of a desert plant nursery I knew I probably wasn't going to be using pastel blue, or purple, or gold, or anything like that- but I wasn't trying to 'match' any specific colors or pull together a 'theme' at that point.  

I rifled through my boxes o' stuff (you can see my current organization method in this blog post), and grabbed anything that caught my eye in colors that I thought might work... I decided to limit myself to items in olive-y greens, orange, golden-yellow, along with some random pieces in red, brown, and blue. 

my pile of potential embellishments, stickers, and borders
Next, I went through my patterned paper and pulled out any pieces that looked like they might work with the same color palette. Again, I didn't make any choices yet, just pulled out colors / patterns I thought might work and set them aside. Lots of yellows, a few greens, orange, red, a couple blue, etc. I probably ended up with, maybe, 10-12 pieces total?

first pass: my potential patterned paper pile
(say that 5 times fast, lol!)
Then I very quickly made a second pass through this entire pile (it only took a couple minutes). Many papers I liked at first glance didn't make the cut (a couple examples:  the too-tropical-looking green pattern, the red paper that turned out to be on the pink side, the blue paper that looked way too much like the other blue one, etc.). I narrowed it down from 12-14 pieces to approximately six pieces that all more or less coordinated with each other in terms of the colors, and set my rejects aside. The picture below is what survived the second pass:
patterned paper + borders, scraps, etc. that made the cut
(at this point there's still no guarantee that I'll use them)
I very quickly did the same process with my cardstock. I knew I needed two pieces (2-page layout), and I knew I wanted it to be a somewhat darker color. This is my first pass, after rifling through the cardstock storage box for only about 30 seconds:


All this cardstock is from the Bazzill warehouse sale, by the way- nothing beats getting a 12x12 pizza box stuffed full of cardstock for a flat fee, even if I did wait in line for an hour to get into the warehouse! And, somewhat embarrassingly, I went to this sale the year before last, I think, and the box is still pretty full. Not much scrapping happened last year, at all. (But, I hope to change that this year in a major way, with some personal goals and challenges posted on the new SB message boards I've been hanging out on.)

I decided to use the very first color of cardstock that I picked out (funny how that can happen, isn't it??) and put the rest of it back in its pizza box. Next, I arranged the photos onto the cardstock, so I could see how much real estate I had to work with for 'decorating' my layout:

the bare bones of the SB layout- photos + cardstock
(I worked out this photo arrangement a couple weeks ago, at the same time I printed the photos so I could decide which photos to choose, and what sizes to print them at. FYI, here's a tip: I worked out the photo arrangement using two 12x12 sheets of white cardstock. Once I had them arranged how I wanted them, I took a picture of it so I could remember it for later! I don't know why it took me such a long time to come up with that idea- it's such a simple one- but I think it's a brilliant one, since 1) I tend to do my scrapping in 'stages' instead of all at once, and 2) my memory is horrible, lol!

So, next up is 'what I did' with all this paper, doo-dads, and photographs. Stay tuned for that! (since I'm still not quite finished with it, lol!)


March 17, 2013

a (real-life) scraproom tour

so, I thought I'd show the 5-cent tour of my crafting space. Now, keep in mind that this is real life, not anything staged-- so, this is what it looks like when I'm working in it. It's not exactly 'clean' but it's organized enough for me to find what I need (usually). I started out standing pretty much in the center of the room, and I took the pictures going clockwise around the room.

my desk, from the Container store- my primary workspace.
(notice the Diet Dr. Pepper, one of my essential supplies!)

my ancient television, in the corner of the room. If I'm not watching a DVD,
I usually have the Boomerang cable channel on to watch retro cartoons.
Sometimes the cats come up and hang out with me; in that case, I'll have to move some of the stuff so they can look out the window. I picked up the rolling liquor (?) tray table thing at an estate sale. It holds my extra page protectors, as well as unfinished and finished SB pages in boxes. Next to it is my Cropper Hopper paper storage which holds hanging file folders.

the cropper hopper hanging files hold pretty much my entire collection of patterned paper, arranged in my own particular order- sort of by manufacturer, as well as the 'mood' of the paper. The box above it holds any patterned paper sheets that have been cut into and are no longer 12x12.
 The cropper hopper is another piece that's been in my collection for years- I think I bought it about 15 years ago, and it's been holding my patterned paper ever since. The basket part lifts out so I can take it with me to crops (since I like to have all my supplies with me, lol!). Plus, it helps keep my collection of paper contained- I don't want to ever have more 12x12 patterned paper than what fits in here- otherwise, there's just too much for me to be comfortable with, and I know I need to thin out my collection. 

The wall opposite the desk is entirely full of shelves, both bookshelves and adjustable hanging shelves on the wall. I got these shelves about 15 years ago, too (also at the Container store) and have used them in every crafting space I've ever had- they're the best thing for holding all the 'stuff' that comes with my many different types of crafts. I also have two Ikea bookshelves, which are arranged one on either side of the hanging shelves.

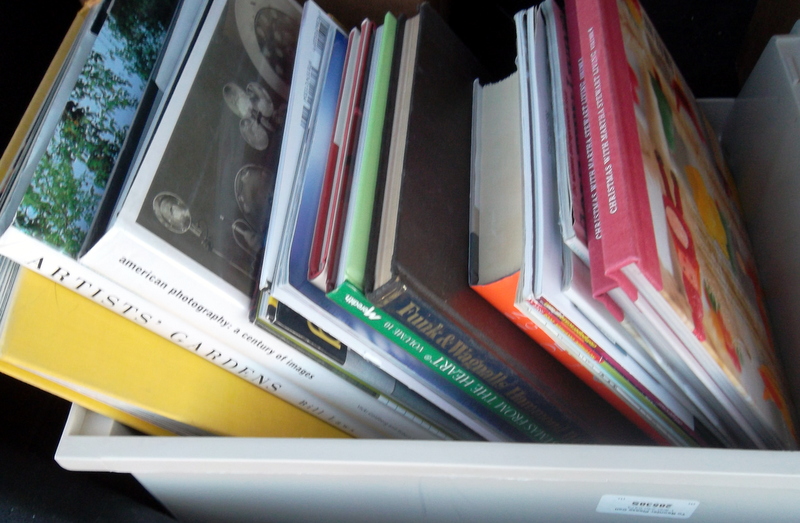
the left-hand bookshelf holds my art journals, some art books, various other books
(incuding some of my childhood favorites- thanks, Mom!), and a number of cigar boxes
that I use for storing various smaller-size crafting and scrapping supplies.

a view of the hanging shelves, plus the 2x2 cube Expidit shelf (also from Ikea)
that holds my vintage typewriter and various other supplies.
The wooden table also came from Ikea, and is my secondary work surface.
(it used to be our kitchen table, actually- lol!)

a closer view of a couple of the shelves. I recently re-organized alot of my supplies
into these 12x12 plastic boxes, and I like this system a lot. Things are organized
into categories so they're easy to find, and the boxes are easy to look through.

farther along the same shelves-- I can display my latest completed scrapbook page, there's still some empty space for displaying other things, and my paper cutters and sewing templates are easily accessible right next to my work surface.
 and, now for the total 'reality-check' part of the tour- the closet:

The closet had doors on, but we took them off to give easier access to the space inside. This is the 'not-so-neat' part of my crafting space-- it's various spaces and boxes hold my acrylic paints, random vintage books I use for journaling, and rolled sheets of paper, along with boxes of fabric, sewing supplies, cross-stitching fabric, polyfil stuffing, etc. and other things I don't need to access very often. 

and last but not least, one of the newest / oldest items in my crafting space, my pencil sharpener, which is attached to the wall next to the closet:

this pencil sharpener came from my Grandma's house, and had been 'lost' for quite
a while, till I re-organized my crafting space and found it again!
Thanks for coming along on the nickel tour of my crafting space! Right now, I'm not actually not working in this space, though- lol! go fgure, right?!? I've got my computer, photo printer, and idea books spread all over the table in the kitchen, planning scrapbook pages and layouts, and editing / printing photos. 

February 10, 2013

you don't know what you have until you clean your room...

 ...and when you do clean, you find all sorts of interesting things!! I'm finally pretty much finished with cleaning and organizing my craft room (as much as I'm going to do for now, at least...) and I have four boxes of stuff sorted out that are going to go to the local scrapbook store's garage sale in April. One box of magazines and assorted art / scrapbooking books, and three boxes of paper, stamps, inks, and other 'stuff.' For now, they're all living underneath my table, (mostly) out of the way.

the garage sale stuff includes things like alcohol inks (I never did figure
out how they work), storage organizers I no longer use, stuff like that.

rubber stamps I don't use any longer, deco tape in colors I don't
like, patterned paper and cardstock I know I won't use, etc.

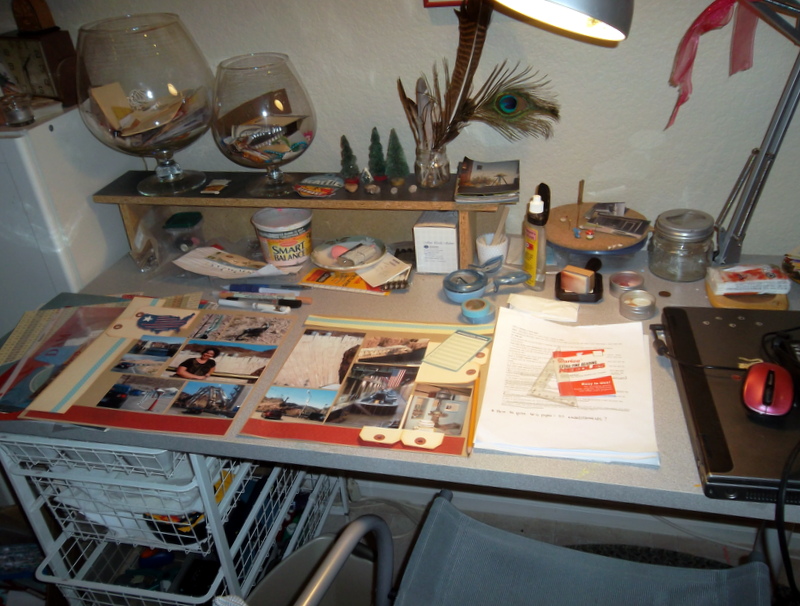
my workspace, with enough space on to actually work!
I've been working on finishing up the layout seen on my desk above- a stop at Hoover Dam from Labor Day weekend, 2009.  It's nice to have usable workspace again! (although I do have to work at keeping it usable; I have a tendency to get a ton of stuff out when I work...)

the other table, now with sewing machine!
The other table is now cleaned off (enough) to work on, too! (the scrapbook store garage sale stuff is underneath this table...) I finally got this table cleared off enough so I can have the sewing machine out all the time. I've seen lots of scrapbook pages and cards with sewing on, and this way, I'll be able to use the sewing machine without having to haul it out of its previous storage cabinet...this way I'll be more apt to use it than I otherwise would have been.

and now, for the 'you don't know what you have until you clean' part of the post:

my old-school pencil sharpener, now found, and finally
up on the wall so I can admire (and use) it!
 I've had this pencil sharpener for years-- it came from my Grandma's house, I believe, and I've had it up wherever I've lived.  I had it up in my craft room in our previous house, but I never had it up in this room- mostly because I only just found it a couple weeks ago! (I had it stored in a super-secure location, so I wouldn't lose it, I guess.) I do have a small pencil sharpener I carry in my scrapbook tool box, but there's just something nostalgic about cranking the handle on an old-fashioned manual pencil sharpener.


February 01, 2013

some 'new-school' and some 'old-school'

[First for the New School part of the post: Mists and Spray Inks are trendy in scrapbooking right now.]

Still in an organizing and purging sort of vein, here's a crafty bit of organization that was inspired by a post on another scrapper's blog (Sue Althouse's Life & Memories) which was inspired originally by someone on the October Afternoon design team, if I remember correctly. (I love how the internet works that way, don't you?!?) This is the first 'crafty-ness' I've actually done since before Christmas... it's about time, I think! (I can tell when I haven't been creating anything for a while; I get that 'itch' to do something again, but have to work myself back into the creative mindset. This was a good way to start: a small, easy-to-complete project.)

Tag book showing spray mist / ink colors
I have a few bottles of spray ink and color mists, but I haven't really used them much on my SB pages. I've mostly used my spray inks and mists on journal page backgrounds such as these, but I've only used them on a couple SB pages (these Street Art SB pages are about the only ones I can remember). I'd like to use them more often, but I don't really think about them, and from just looking at the bottles, it's difficult to figure out exactly what the colors look like after they're sprayed. That's where the organizing part of this comes in! I'll keep this tag book of color swatches somewhere handy so I can see which, if any, colors match the project I'm doing.    

The cover- a manila shipping tag
The cover was made very simply using my Tiny Attacher stapler (I love that thing!), some graph paper, and a couple different alphabet stickers. Funny thing: the green alphabet letters were a Big Lots discount store purchase... they're American Crafts brand stickers, and they smell like green apple!! lol!! They also had some stickers that smelled like fruit, I think-- very funny! I remember scratch & sniff stuff from when I was growing up, so I had to get them! (plus, I really like the font.)
my favorite Dylusions spray ink colors... yummy!
I typed the names out with my typewriter (thank goodness it still works after all these months of sitting idly in my craft room!) and stapled them to each tag with the Tiny Attacher. Now if I want to see whether a particular color works with a project or not, I can just hold the tag up to it.

Mist and spray ink collection January 2013
Mist collection April 2012
As you can see from the pictures above, my collection hasn't grown too much; they still all fit in the same container! But, I really would like to use them on my SB pages sometimes. Hopefully this tag book will help do the trick!


[Now for the 'Old School' part of the post: stickers.]

Remember how scrapbooking stores used to have an entire wall full of rolls of stickers?? Stickers of every color, shape, and theme you could think of. Need stickers for Easter? got 'em. Need stickers for moving into a new house? got them, too. Need stickers with pizza or popcorn on? yup, they had those, too! 

'old-school' stickers... 
In my purging and organizing, I've tried to be pretty honest with myself about what supplies I think I will or won't use. I have a decent-sized stash of stickers here, some of which have got to be at least 10- maybe closer to 15- years old! I kept organizing and storing them, thinking 'I might use them someday, so I should keep them.' Well, not any more. I know this kind of sticker is not my style any longer, so they're headed to the scrapbook store's garage sale where they'll hopefully be bought by someone who will use them, instead of just 'storing' them for years.

A collection of Susan Branch stickers. They're pretty,
but they're not my style any longer, at all.
Most of these stickers are 5-10 years old at least, if not older. And I can't remember the last time I used one of them; it had to be at least a year or two ago! They are pretty, though... I've had to stop myself a couple times from taking things back out of my 'garage sale' pile-- doing it makes me think a bit of the people they showcase on the television program Hoarders, though- you know, those people who are so obsessed with their stuff that they won't let any of it be thrown or given away- so I usually put the item right back. (except for one or two pieces of paper, I think... but that's all!)

Brands like Mrs. Grossman, Frances Meyer, and Deluxe Cuts...
that wall of stickers at the scrapbooking store was so much fun!
Of course, if I kept them long enough, maybe they'll come back into 'scrapping fashion' since that seems to have already happened with vellum and some other scrapping trends. (I still have my vellum, too- I'm keeping that! lol!)


January 31, 2013

and now,some of the 'organize' part of the project:

So, organizing for me- and maybe most scrapbookers or crafters- is an ongoing process: how best to contain and store the supplies so that you know what you have, can get to them when you need them, and can keep the space organized (as organized as necessary, depending on where you work) when you're done? I still haven't hit on the winning combination, but I think I'm getting closer. I also think part of it is knowing how you work, and doing what's best for the way you work. There are so many items you can buy for organizing crafting supplies that it can get overwhelming. If you look at magazines or the internet, you can see countless 'pretty' pictures of creative spaces where everything is sorted by color, or by item type and color, in boxes or jars... and sometimes I wish mine could look like them, but they just don't work for me. 

In the past, I've tried sorting and organizing things into small containers, or little drawers, like the photo below (this pic is from our previous house):

  
(It's messy, but I wanted to point out a couple things- the first is the yellow unit on the left side with the labeled drawers. I sorted little things (buttons, brads, etc) into the drawers, but then I'd have to open 4 or 5 of them to find exactly what I wanted. Some of my unmounted rubber stamps were stored in a large three-ring binder on the shelves above the desk. It might look good for storage, but I'd never use them! The shelves above the desk also hold bins (homemade) that I used for storing my paper scraps in zipper bags, sorted by color (ROYGBIV). Again, after I sorted and stored them, I'd never use them again. The paint-can-looking thing in the middle of the desk was for organizing tools; it had lots of little pockets for holding your pens, scissors, and the like. You guessed it- I'd never use any of it. (or if I did use something, I wouldn't put it back, because it was too hard to find it again.) 

So, my new strategy for organizing is: Categorized Rummaging, lol! I'll explain a bit below...

The tool bin. (it's an ArtBin Super Satchel divided bin) 
This container holds scissors, adhesive, my most often-used mini alpha stamps, replacement blades for my paper cutter, etc... the things I need for most of my scrapbooking or crafting projects. I've been using the tool bin for a while now, and it seems to work pretty well; I can see what's in it by just opening the lid, and things are well-contained inside it. Obviously it travels well if I scrap away from home, but even when I'm home, I just leave all these supplies in it. That way, there's only one place I have to look for any of these items. And it's clear, so I can see at a glance what's in it (in a general sense, anyway).

Since this had been working for me, I decided to do something similar with my other supplies. No more teeny drawers of things sorted by color, no more boxes that I can't see into so things get forgotten about... I need to see it so that I'll use it, but still be able to contain things (somewhat) so they don't get dusty, or don't get chewed up or dragged around by cats. (don't laugh, they've done that!)

The decorative tape bin
(along with a few stamps that I need to put away)
And hey, there's plenty of space for more tape!! lol!

The memorabilia bin
I bought a number of 12x12 bins at Michael's recently when they were on sale for super-cheap; they don't have the handle like the ArtBin does, but they'll do just fine. This particular one is where I've started to put memorabilia I might want to use for a SB page- various pamphlets, business cards, maps, stuff like that. This container / category is still a work-in-progress, but it's better than where this stuff used to be, which was in assorted bags stuffed on a bookshelf, or worse yet, piled in the middle of the kitchen island!

Shiny stuff-- rhinestones, sequins, and the like.
A lot of people do their organizing by color- all the blue paper, stickers, rhinestones, thread, etc together. That's fine for them if they think like that... "I want to make a blue-themed page so I'll get all my blue stuff out." That's not how I work, though. I haven't figured out what my exact thought process is quite yet, but I know it's not that. So, I sorted through my stuff and took out all the similar things- is it shiny or does it have rhinestones? if so, it goes in this bin. (this stuff will probably end up in a box with a lid, so I can travel with it if needed.)

The 'additional stuff' bin, for want of another term:
border stickers, other stickers, chipboard shapes, flowers, etc.
Other people create their pages or projects based on the manufacturer brand-- they might want to make a page or card using all Echo Park or Studio Calico materials, so they store their supplies separated by manufacturer. I did have some of my stash organized by manufacturer, but again, there would be a lot of stuff I wouldn't ever even look at, let alone use. With my supplies organized into larger categories (based on 'what' it is rather than who made it or what color it is), there's at least some chance I'll look at it and use it on my page, no matter what company made and sold it.

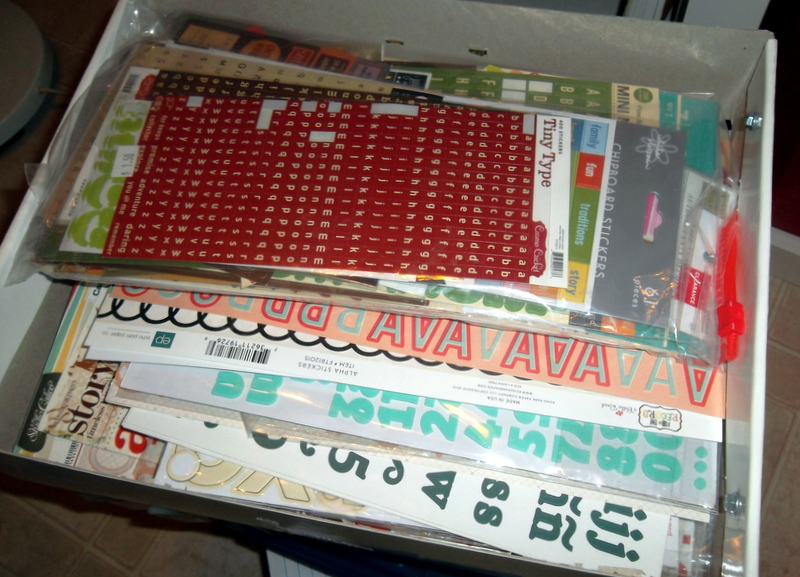
The alphabet sticker box, separated into two
arbitrary categories: 'large' and 'small'
Again, all different colors and all different
manufacturers are stored in the same box.
I haven't really used this new system to make a scrapbook page yet so I don't know how well it will actually work, but I'm thinking it's closer to the way I think and create than the way I used to have things stored. I like 'rummaging' through boxes and shelves when I'm at a flea market, antique store, or estate sale, so I decided to apply the same sort of thinking to my scrapbooking supply storage. 

Journaling card storage: all sorts of stickers, cards, and
shapes that have blank spaces for writing on. (mostly)
In addition to journaling cards, the container above (sorry for the dark photo) also holds my small stash of October Afternoon, Cosmo Cricket, and Studio Calico stickers and cards (right after I said I didn't want to separate things by manufacturer, lol!). But those are my very favorite ones, and this will hopefully make it easier to find them when I want to use them.

There are more categories of things I don't have current photos of yet (patterned paper and cardstock come to mind) and others I don't have completely sorted out yet, like my stamps and inks. I'll take more pictures as I finish the re-organizing process.

One other thing this has shown me about my supplies is that I have alot more of some things than I thought. I would have never thought I had enough alphabet stickers to fill that entire box! That means I don't really need to buy any more until I use some of them, loL! And hopefully now that they're more centrally located, I'll find it easier to do that very thing! Not everything is organized yet, and I certainly wouldn't call this system 'totally' organized (or pretty) by any stretch, but it's a start... and it's a bit of a mind-shift for me that will hopefully improve my creative process in the long run. We'll see how it goes, and whether I need to tweak it some more. 

Hopefully this new method of organization will help me to avoid a work space that looks like this:


(in my defense, this pic is of my space at a weekend long crop where there were no cats. But still, there's only so long that you can work in a space that looks like this- and it isn't very long, lol!)

January 29, 2013

making good on my New Year's resolution...

...to purge, clean, and organize my craft space-- you know, that room that I could barely walk into a month ago, lol! I think it's well on its way to finally being organized and usable! I did a lot of purging to start: we have a 55-gallon recycle bin, and I probably filled it once, all by myself, with just paper and cardboard-- lots of it was scrapbooking layouts I had printed off the internet, old, old issues of scrapbooking magazines, and all sorts of cardboard boxes. After looking at it all, I realized most of it was really useless- I currently use the website Pinterest to save links to scrapbook layouts and websites I like, and most of the magazine information seemed extremely outdated (not to mention full of out-dated advertisements). So, off to the recycle bin it went! (At least 5 medium-sized boxes of random stuff went to Goodwill, as well: books, old dishes, etc., most of which I probably got at the thrift store to begin with.)

Goodwill books

Sad to say, some of the boxes I unpacked while doing this cleaning project had never been unpacked from when we moved into this house initially, over 3 years ago now. I guess that means I didn't really need the stuff inside them very bad, doesn't it?? (I did find some things I thought I'd lost, too, though, which was cool!)

assorted Goodwill stuff

The next step was to decide what crafting and scrapbook supplies I didn't want any more, and sort them out... I signed up for the local scrapbook store's spring 'garage sale' in April, where people bring in their scrapbooking and crafting supplies to sell, and get store credit for everything sold. It's a pretty well-attended event, so I hope to make a bit of money (store credit, technically), and pass some of my stuff along to someone else who will find them more useful than I did- things that no longer fit my style, or crafty things I bought intending to use them at some point, but never did. (I'm not the only one who does that, right?!? hopefully not, lol!)

scrapbook garage sale box #1
...things like old sets of rubber stamps (from back when I used to make stamped greeting cards, but I don't really do that very much anymore), rolls of decorative tape I don't really like (and know I won't use), some old bottles of glitter that I bought at the thrift store and never even used...

scrapbook garage sale box #2
...sheets of cardstock and patterned paper that I've had for years and finally decided to pass along to someone else who might use them (I mean, really- why did I ever think I'd use bright orange cardstock, anyway?!? and I know some of the patterned paper was bought back in Illinois, before we moved to AZ), stickers, assorted tags and scrapbooking embellishments...

scrapbook store garage sale books and magazines
...and a large number of more up-to-date scrapbooking magazines and craft how-to books. Hopefully shoppers at the the SB garage sale will like and buy my stuff, so I can get a decent amount of store credit for it (which I will then spend on buying new stuff, of course!! haha!).

I've also done some re-organizing in how my supplies are stored, which I'll show in my next post.  My end goal is that all this purging, cleaning, and re-organizing will allow me to actually create more scrapbook pages and cards! (It's not a very high bar to meet, considering that the last scrapbook page I created was made in May 2012, I think...) In all the time we've lived in this house, my space- and the supplies in it- just wasn't set up in the best way possible, so the only scrapbooking I actually did was when I attended a weekend scrapbooking retreat a couple times a year. I'd really like to do crafty things more often than that, so that means making my space here at home more useful! And finally, I think I'm on the way to doing just that!  (it's about time, right?!? lol!)

(And of course, there's the cat issue to consider as well: I'd really like to be able to keep the door to my craft room open sometimes when I'm not in there, which means things have to be cat-safe. If not, I'll end up finding erasers, paintbrushes, and other little things all over the house... or else they'll be lost forever under the refrigerator or stove.)